
Author: KC

  • How to Relieve Abdominal Gas: A One-Month Comfort Plan

    How to Relieve Abdominal Gas: A One-Month Comfort Plan

    👉 At a glance: Relieving abdominal gas over about a month is realistic with a step-by-step plan: adjust eating habits, identify trigger foods, support gut bacteria, add gentle movement, and track progress. Consistency turns small changes into lasting comfort.

    Why Gas Builds Up

    Gas is a normal by-product of digestion, created as gut bacteria ferment food and as you swallow air. Discomfort happens when gas accumulates faster than it clears, causing bloating, pressure, and cramping.

    Common contributors include eating too quickly, carbonated drinks, and fermentable foods, along with gut bacteria imbalances. Because triggers differ from person to person, self-observation is the key to lasting relief.

    The aim over a month is not to eliminate gas entirely—that is not possible or healthy—but to reduce excess and discomfort through steady habit changes.

    Week 1–2: Adjust Eating Habits

    Begin with how you eat rather than dramatic diet cuts. Eating slowly and chewing thoroughly reduces swallowed air, a frequent and overlooked cause of bloating.

    Cut back on carbonated beverages, chewing gum, and straws, all of which introduce air. Smaller, more frequent meals can be easier to digest, and eating in a calm setting supports smoother digestion.

    Cooking methods matter: some gas-producing vegetables are gentler when cooked than raw, and soaking or cooking beans thoroughly reduces fermentation. Small tweaks let you keep nutritious foods.

    Week 2–3: Identify Trigger Foods

    Keep a food and symptom diary to spot patterns. Common culprits include beans, cruciferous vegetables, onions, dairy, and sugar alcohols like sorbitol.

    Rather than banning foods, reduce suspected triggers and reintroduce one at a time. A short, structured low-FODMAP trial—ideally with a dietitian—can pinpoint sensitivities if simple tracking is not enough.

    Stress management belongs here too, because the gut and brain are closely connected and tension can worsen symptoms. Slow breathing before meals helps your digestive system settle.

    Week 3–4: Support Your Gut and Move More

    A balanced gut microbiome produces less excess gas. Introduce fermented foods like yogurt, kefir, and kimchi, and increase fiber gradually—too fast a jump can temporarily worsen gas.

    Add gentle daily movement: a short walk after meals helps gas pass, and light stretches release trapped gas. By this point, many notice meaningful, lasting improvement.

    If you try a probiotic supplement, give it several weeks and note changes, since effects are strain-specific. Combined with the dietary steps, it may add another layer of relief.

    When to See a Doctor

    Mild, occasional gas is normal, but see a doctor if bloating is constant, worsening, or accompanied by weight loss, blood in the stool, severe pain, or vomiting. These can signal conditions needing diagnosis.

    Persistent symptoms despite a month of effort also deserve evaluation, as IBS or food intolerances may be involved. Do not push through red-flag symptoms—get them checked.

    ⚠️ Caution: Constant or worsening bloating with weight loss, blood in the stool, severe pain, or vomiting needs medical evaluation rather than continued self-management.

    Keeping a brief food-and-symptom diary throughout the month turns vague impressions into useful patterns that make it easier to identify your personal triggers.

    Key Takeaways

    • Some gas is normal; the goal is reducing excess and discomfort.
    • Start by eating slowly and cutting carbonated drinks and gum.
    • Use a diary to identify and moderate trigger foods.
    • Support gut bacteria and add gentle post-meal movement.
    • See a doctor for persistent or red-flag digestive symptoms.

    This article is general information and does not replace professional diagnosis or treatment. Consult a qualified provider if symptoms persist.

  • Acne Skincare Routine: Effective Tips and Product Recommendations

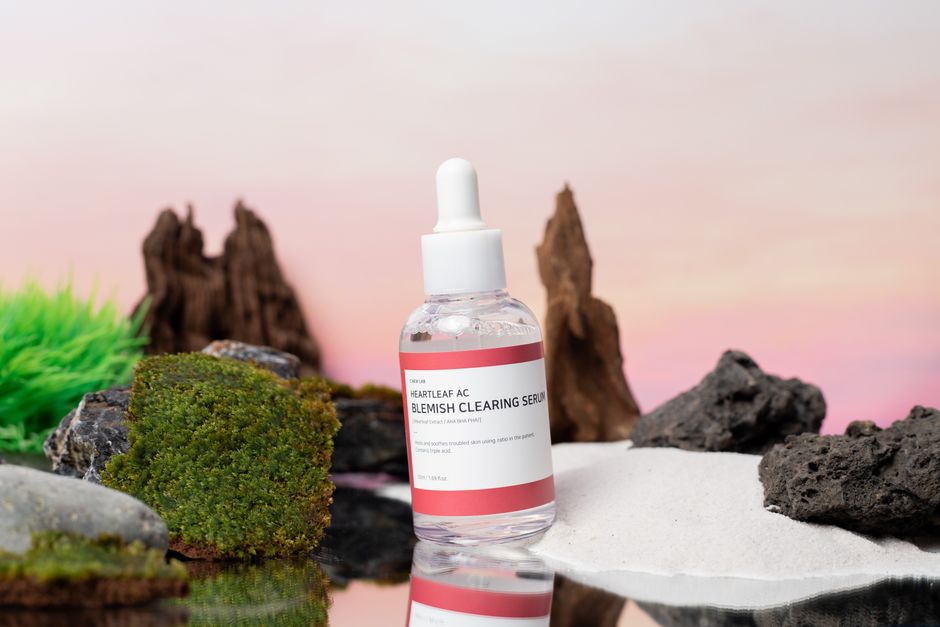
    Acne Skincare Routine: Effective Tips and Product Recommendations

    👉 At a glance: An effective acne skincare routine combines gentle cleansing, targeted actives like salicylic acid or benzoyl peroxide, lightweight moisturizing, and daily sunscreen. Consistency and simplicity—not harsh over-treatment—are what clear skin.

    Understanding Acne-Prone Skin

    Acne develops when pores become clogged with excess oil and dead skin cells, allowing bacteria to thrive and trigger inflammation. Hormones, genetics, stress, and certain products all influence how prone your skin is.

    Because several factors combine, there is no single overnight cure. The most reliable path is a consistent routine that keeps pores clear, controls oil, and calms inflammation without damaging the barrier.

    A common mistake is over-treating acne with harsh products, which strips and irritates the skin and often makes breakouts worse. Gentle and steady wins.

    Cleansing and Exfoliating

    Start with a gentle cleanser twice a day to remove oil and impurities without stripping the skin. Avoid harsh scrubbing and aggressive foaming cleansers, which irritate and increase oil production.

    Chemical exfoliants are often better than physical scrubs for acne. Salicylic acid penetrates oil to clear pores from within, ideal for blackheads and whiteheads. Use it a few times a week rather than daily to avoid over-exfoliation.

    Applying strong actives to the whole area where you break out—not just existing pimples—often gives better long-term prevention, helping stop new ones from forming.

    Targeted Treatments

    For active, inflamed breakouts, benzoyl peroxide reduces acne-causing bacteria. Retinoids like adapalene increase cell turnover and prevent new clogs, addressing acne at its root over time.

    Niacinamide is a gentle addition that helps control oil and soothe redness. Introduce one active at a time and start slowly—every other day—to let skin adjust and identify what works.

    Lifestyle factors support your routine: changing pillowcases, keeping hair and hands off your face, and managing stress all reduce triggers. They remove obstacles to clearer skin.

    Moisturizing and Sun Protection

    Even oily, acne-prone skin needs moisture. A lightweight, non-comedogenic moisturizer keeps the barrier healthy, which actually helps control oil and reduces irritation from acne treatments.

    Daily sunscreen is essential, since many acne actives increase sun sensitivity and sun darkens post-acne marks. Choose an oil-free, non-comedogenic SPF 30 or higher every morning.

    Resist picking or squeezing pimples, which pushes bacteria deeper, prolongs healing, and raises scarring risk. Letting blemishes heal on their own, aided by targeted treatment, leads to better results.

    Possible Side Effects and Precautions

    Acne actives can cause dryness, peeling, redness, or a temporary purge. Easing in gradually and moisturizing minimizes these effects. Most treatments take six to eight weeks to show clear results.

    For severe, cystic, or scarring acne, see a dermatologist rather than relying on OTC products alone. Pregnant or breastfeeding individuals should avoid many retinoids and confirm safe options.

    ⚠️ Caution: Avoid over-washing and harsh scrubbing, which worsen acne; introduce actives slowly with sunscreen, and see a dermatologist for cystic or scarring breakouts.

    Key Takeaways

    • Acne comes from clogged pores, oil, bacteria, and inflammation.
    • Cleanse gently twice daily and exfoliate with salicylic acid a few times a week.
    • Use benzoyl peroxide or retinoids for active breakouts, one at a time.
    • Moisturize with non-comedogenic products and wear daily sunscreen.
    • Give treatments 6–8 weeks and see a dermatologist for severe acne.

    This article is general information and does not replace professional diagnosis or treatment. Consult a qualified provider if symptoms persist.

  • Cold Prevention: Habits and Supplements to Boost Your Immunity

    Cold Prevention: Habits and Supplements to Boost Your Immunity

    👉 At a glance: Preventing colds means supporting immunity year-round: prioritize sleep, nutrition, and hygiene, and use targeted supplements like vitamin D, vitamin C, and zinc. Good habits reduce how often you get sick and how long colds last.

    How Colds Spread and Why Prevention Matters

    Common colds are caused by viruses that spread through respiratory droplets and surfaces. While usually mild, frequent colds disrupt life, and prevention is far easier than treatment since there is no cure.

    A resilient immune system does not stop you encountering viruses, but helps your body respond quickly and recover faster. Supporting immunity is about reducing frequency and severity, not perfect immunity.

    Cold-and-flu season, with more time indoors and drier air, is when prevention pays off most—so building habits ahead of time matters.

    Everyday Habits That Prevent Colds

    Hand hygiene is one of the simplest, most effective defenses: wash regularly with soap, and avoid touching your face, where viruses enter through the eyes, nose, and mouth.

    Consistent, quality sleep is a powerful immune supporter, while regular exercise and stress management keep defenses strong. Staying hydrated and not smoking further protect respiratory function.

    Indoor air quality plays a role in colder months. Dry air can irritate airways and help viruses linger, so using a humidifier and ventilating rooms supports your defenses.

    Nutrition for a Strong Immune System

    A varied, nutrient-rich diet supplies the vitamins and minerals immunity relies on. Colorful vegetables and fruit provide vitamin C and antioxidants, while adequate protein supports immune cells.

    Fermented foods like yogurt and kimchi support gut health, closely tied to immune function. Warm fluids and hydration keep mucous membranes—an important first line of defense—working.

    Timing zinc correctly matters—evidence suggests it works best within the first day or two of symptoms, not as an ongoing high-dose habit. Keeping some on hand for early use is practical.

    Helpful Supplements

    Vitamin D is a standout because deficiency is common in winter and it supports immune regulation. Vitamin C supports immune cells, and zinc may shorten a cold’s duration when taken early.

    Probiotics support the gut-immune connection. Use supplements to fill likely gaps rather than taking high doses of everything, and pair them with the lifestyle habits that do the heavy lifting.

    Influenza vaccination is worth considering, especially for those at higher risk. While it does not prevent the common cold, it reduces the chance and severity of flu, which can be far more serious.

    Possible Side Effects and Precautions

    Supplements are helpful in moderation but harmful in excess: too much vitamin C upsets the stomach, prolonged high-dose zinc depletes copper, and fat-soluble vitamins like D can build up. Stick to recommended amounts.

    If cold symptoms are severe, last beyond ten days, or include high fever, difficulty breathing, or chest pain, see a doctor. Those pregnant, medicated, or with conditions should consult a provider before supplementing.

    ⚠️ Caution: See a doctor if cold symptoms are severe, last beyond ten days, or include high fever, chest pain, or breathing difficulty—and avoid high-dose supplement stacking.

    Staying home and resting when you fall ill helps you recover faster and avoids spreading the virus to others around you.

    Key Takeaways

    • Colds spread via droplets and surfaces; prevention beats treatment.
    • Wash hands, avoid face-touching, and prioritize sleep and exercise.
    • Eat a varied, nutrient-rich diet and stay hydrated.
    • Vitamin D, vitamin C, and zinc can support immune defenses.
    • See a doctor for severe or prolonged symptoms.

    This article is general information and does not replace professional diagnosis or treatment. Consult a qualified provider if symptoms persist.

  • Wealth Mindset Books: Essential Reads for Building Financial Success

    Wealth Mindset Books: Essential Reads for Building Financial Success

    👉 At a glance: Self-development books on wealth teach mindset, habits, and financial principles rather than get-rich-quick tricks. Classics on money psychology, investing basics, habit-building, and long-term thinking offer the most lasting value for building wealth.

    Why Read Books About Wealth?

    Books about becoming wealthy are less about secret formulas and more about reshaping how you think, spend, save, and invest. The most valuable ones build financial literacy and mindset habits that support long-term success.

    Reading widely exposes you to different philosophies—frugality, entrepreneurship, and investing—so you can find principles that fit your goals. No single book has all the answers, but patterns emerge across the best ones.

    Approach these books critically. The goal is to extract durable principles and apply them consistently, not to chase every trendy tactic or promise of overnight riches.

    Books on Money Mindset and Psychology

    A large share of financial success comes down to behavior and psychology rather than raw knowledge. These books explore how emotions, habits, and beliefs shape money decisions, helping readers avoid common self-sabotage.

    They emphasize living below your means, delaying gratification, and understanding assets versus liabilities. A healthy relationship with money often matters more than any specific investment tip.

    Books on Habits and Personal Growth

    Wealth-building is a long game, and personal-development books on habits provide the engine. They teach how to set goals, build consistent routines, and make small daily improvements that compound.

    This category connects self-improvement to financial results: better time management, focus, and follow-through translate into career growth. The core lesson is that consistent systems beat bursts of motivation.

    Distinguish between proven practitioners and those selling a personality or program. Authors with a track record of transparent advice offer more reliable guidance than those whose main product is the hype itself.

    Books on Investing and Financial Principles

    Foundational books explain compound interest, diversification, index investing, and managing risk. These principles form the backbone of building lasting wealth.

    Beginner-friendly titles focus on timeless fundamentals—spend less than you earn, invest steadily, and let compounding work—rather than speculative strategies. Understanding basics helps you avoid costly mistakes and scams.

    Building a small reading habit—even a few pages a day—lets ideas accumulate. Pairing books with reputable articles or a study group deepens understanding and keeps you accountable to applying what you learn.

    How to Get the Most from These Books

    Reading alone changes little; applying ideas is what matters. Take notes, choose one or two actionable principles from each book, and put them into practice. Small, consistent action compounds just like money.

    Be wary of books promising fast, guaranteed riches, as genuine wealth-building is gradual and grounded in fundamentals. Consider professional financial advice for major decisions rather than relying on any single book.

    ⚠️ Caution: Be skeptical of books promising fast, guaranteed riches—real wealth-building is gradual, and major financial decisions deserve advice from a qualified professional.

    The real value comes from applying what you read, so choosing one idea to act on from each book turns passive reading into lasting change.

    Key Takeaways

    • Wealth books teach mindset, habits, and principles—not quick tricks.
    • Money psychology often matters more than specific tactics.
    • Habit and personal-growth books provide the discipline to succeed.
    • Investing fundamentals like compounding form the practical foundation.
    • Apply one or two ideas from each book rather than just reading.

    This article is general information and is not financial advice. Consult a qualified financial professional before making major decisions.

  • Healthy Weight Loss: Balanced Diet Plans and Simple Recipes

    Healthy Weight Loss: Balanced Diet Plans and Simple Recipes

    👉 At a glance: Effective weight loss comes from a modest calorie deficit built on whole foods, balanced meals with protein and fiber, and sustainable habits—not extreme diets. Simple recipes and consistent routines beat restrictive plans you cannot maintain.

    The Foundation of Healthy Weight Loss

    Weight loss fundamentally comes down to consuming slightly fewer calories than you burn, creating a modest deficit. The healthiest approach aims for gradual loss of about half a kilogram to one kilogram per week.

    Crash diets and extreme restriction may produce quick results, but they are hard to maintain and often lead to regaining the weight. Focusing on nourishing foods and habits you can keep for life is far more effective.

    Rather than obsessing over a single number, aim to build a balanced pattern of eating that supports energy, satisfaction, and steady progress.

    Building a Balanced Diet Plan

    A good weight-loss plate centers on lean protein, plenty of vegetables, some whole grains, and healthy fats. Protein preserves muscle and keeps you full, reducing cravings.

    Fiber-rich foods add volume and satiety for few calories. Filling half your plate with vegetables is a simple, reliable strategy that naturally moderates calorie intake.

    Staying hydrated and limiting sugary drinks, refined snacks, and ultra-processed foods removes a lot of empty calories without much effort.

    Smart snacking bridges meals without derailing progress. Options like fruit with nuts, vegetable sticks with hummus, or plain yogurt keep you satisfied—unlike sugary packaged snacks.

    Simple, Healthy Recipe Ideas

    Easy meals make a plan stick. Greek yogurt with berries and nuts, or eggs with vegetables, provides protein and fiber. For lunch, a large salad with grilled chicken, beans, and olive oil is filling and balanced.

    Dinner might be baked fish or tofu with roasted vegetables and a small portion of whole grains. Batch-cooking staples makes it easy to assemble healthy meals and avoid impulsive choices.

    Focus on non-scale signs of progress, such as improved energy, better-fitting clothes, and stronger workouts. Weight fluctuates day to day, so these broader markers give a more accurate picture.

    Habits That Support Success

    Consistency and planning beat willpower. Preparing meals ahead and eating regular meals prevent the extreme hunger that leads to overeating. Eating slowly and mindfully helps you recognize fullness.

    Combine diet with regular physical activity, which supports weight loss and preserves muscle. Adequate sleep and stress management matter too, since both influence appetite hormones. Expect natural fluctuations.

    Possible Pitfalls and Precautions

    Avoid very low-calorie or single-food diets, which can cause nutrient deficiencies, muscle loss, and rebound weight gain. Extreme restriction also harms your relationship with food and is rarely sustainable.

    If you have a medical condition, take medication, are pregnant or breastfeeding, or have a history of disordered eating, consult a provider or registered dietitian first. Individualized guidance is safest and most effective.

    ⚠️ Caution: Avoid extreme or very low-calorie diets, which can harm your health and backfire—consult a professional before starting if you have a medical condition or history of disordered eating.

    Focusing on progress rather than perfection keeps you motivated, since occasional slip-ups matter far less than what you do consistently over weeks and months.

    Key Takeaways

    • Weight loss requires a modest, sustainable calorie deficit.
    • Build meals around protein, vegetables, fiber, and healthy fats.
    • Simple, batch-friendly recipes make healthy eating stick.
    • Combine diet with exercise, good sleep, and stress management.
    • Avoid extreme diets and seek professional guidance when needed.

    This article is general information and does not replace professional diagnosis or treatment. Consult a qualified provider if symptoms persist.
  • Summer Makeup Base and Sunscreen: The Perfect Combo for Lasting Wear

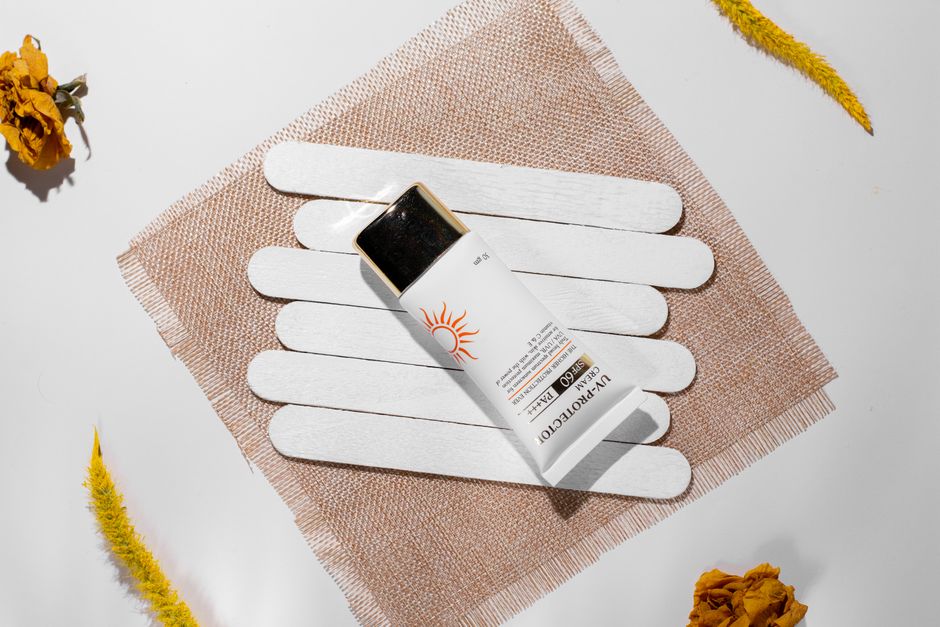
    Summer Makeup Base and Sunscreen: The Perfect Combo for Lasting Wear

    👉 At a glance: In summer, pairing a lightweight makeup base with a high-SPF sunscreen keeps skin protected and makeup lasting. Apply sunscreen first, let it set, then layer a thin, sweat-resistant base for a fresh, long-wearing finish in the heat.

    Why Summer Needs a Special Base-and-Sunscreen Combo

    Hot, humid weather challenges both skin protection and makeup wear. Sweat and oil can break down products quickly, while stronger UV rays make sun protection more important than ever.

    The right combination—an effective sunscreen plus a lightweight base—keeps skin shielded from UV damage while helping makeup stay put. Heavy products slide or feel greasy, so summer favors lighter, breathable formulas.

    Getting this pairing right means comfortable, protected skin and a natural finish that lasts through the day.

    Choosing the Right Sunscreen

    Sunscreen is the non-negotiable first step. Look for broad-spectrum SPF 30 (SPF 50 for extended outdoor time) with high UVA protection. In summer, lightweight, non-greasy formulas that layer under makeup are ideal.

    Gel or fluid sunscreens absorb quickly in heat, while mineral options suit sensitive skin. Water-resistant formulas help on sweaty days, though reapplication is still needed every couple of hours outdoors.

    Choosing a Lightweight Makeup Base

    For summer, a light base—tinted moisturizer, BB cream, or thin foundation—gives coverage without heaviness. Oil-free, long-wear, sweat-resistant formulas hold up best in heat.

    A semi-matte or natural finish helps control shine, while a primer improves longevity on oily skin. Building thin layers rather than one thick coat keeps the look fresh and prevents caking.

    Do not forget commonly missed areas like the ears, neck, and hairline when applying sunscreen. These spots get significant sun exposure but are easy to overlook.

    How to Apply the Combo Correctly

    Apply sunscreen first, after skincare, and let it absorb for a few minutes to form an even layer. Rushing makeup on top of wet sunscreen can pill or reduce protection.

    Then apply your lightweight base in thin layers, setting with a light powder if you get shiny. For reapplying over makeup, mist or stick sunscreens avoid disturbing your base.

    Keeping blotting papers on hand is a simple trick: they absorb oil and sweat without smearing your base, so you can refresh and reapply sunscreen over a cleaner surface.

    Give sunscreen enough quantity to actually work—most people apply too little. A generous, even layer provides the labeled SPF, whereas a thin smear leaves you underprotected.

    Setting a phone reminder for reapplication is a simple way to stay protected on long summer days, since it is easy to lose track of time and let coverage lapse.

    Possible Side Effects and Precautions

    Layering products can occasionally cause pilling, clogged pores, or irritation, especially with rich formulas. Choosing non-comedogenic products and letting each layer set reduces these problems.

    Patch-test new sunscreens or bases before a full day of wear. If you experience breakouts or irritation, simplify and switch to oil-free options. Makeup with SPF alone rarely provides enough protection, so a dedicated sunscreen is essential.

    ⚠️ Caution: Makeup with built-in SPF is not enough on its own—always use a dedicated broad-spectrum sunscreen underneath and reapply during extended sun exposure.

    Key Takeaways

    • Summer heat calls for lightweight base and high-SPF sunscreen.
    • Use broad-spectrum SPF 30–50 in a non-greasy, fast-absorbing formula.
    • Pick oil-free, sweat-resistant bases like tinted moisturizer or BB cream.
    • Apply sunscreen first, let it set, then layer thin base coats.
    • Patch-test products and rely on real sunscreen, not just SPF makeup.

    This article is general information and does not replace professional diagnosis or treatment. Consult a qualified provider if symptoms persist.
  • Retinol Cream Review: Honest Benefits, Results, and How to Use It

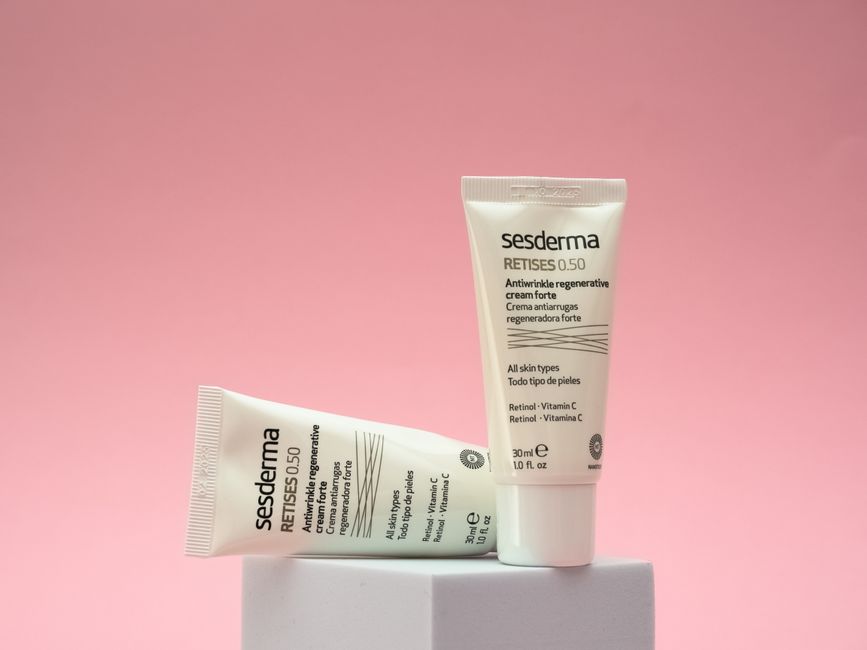
    Retinol Cream Review: Honest Benefits, Results, and How to Use It

    👉 At a glance: Retinol cream is a proven anti-aging ingredient that smooths texture and softens lines—but it requires patience and careful use. This honest overview covers realistic benefits, the adjustment period, and how to use it without irritation.

    What Retinol Cream Actually Does

    Retinol is a vitamin A derivative the skin converts into retinoic acid, which accelerates cell turnover and stimulates collagen. Over time this smooths texture, softens fine lines, fades dark spots, and refines pores.

    It is one of the few ingredients with strong scientific backing for anti-aging, which is why dermatologists recommend it. That said, it is not an instant fix—its benefits build gradually.

    An honest expectation is key: retinol improves skin quality steadily but will not erase deep wrinkles or replace professional procedures overnight.

    The Honest Truth About Results

    In the first few weeks, many experience an adjustment phase with dryness, flaking, or mild redness. This can be discouraging, but it usually settles with time and proper moisturizing.

    Early visible benefits—smoother texture and subtle glow—often appear within about a month. Bigger changes in lines and pigmentation take three to six months, so patience genuinely pays off.

    Tracking your skin with occasional photos helps you notice the gradual progress that is easy to overlook day to day.

    How to Use Retinol Without Irritation

    Start slowly—a pea-sized amount two or three nights a week—and increase as tolerated. Apply at night to dry skin, since retinol degrades in sunlight and increases sun sensitivity.

    Always moisturize to buffer dryness, and consider the “sandwich” method if sensitive. Avoid combining retinol with other strong actives while adjusting, and never skip daytime sunscreen.

    If you found retinol too harsh before, the problem is often the routine, not the ingredient. Lowering concentration, reducing frequency, and buffering with moisturizer usually makes it tolerable.

    Choosing the Right Retinol Product

    Retinol comes in various strengths, so beginners should start low—around 0.2% to 0.3%—before working up. Gentler derivatives are also available for very sensitive skin.

    Packaging matters because retinol degrades with light and air; opaque, airtight tubes preserve potency better than clear jars. Formulas with hydrating ingredients help offset dryness.

    Consistency over the long term is what separates people who see results from those who give up. Retinol rewards steady, patient use far more than chasing the strongest formula.

    Applying retinol around the eyes deserves care, since that skin is thin and easily irritated. Keep it a little away from the immediate eye area at first, or use an eye-specific formula.

    Possible Side Effects and Precautions

    Common side effects include dryness, peeling, redness, and temporary sensitivity, particularly early on. Easing in gradually and moisturizing usually keeps these manageable.

    Pregnant or breastfeeding individuals should avoid retinol and choose safe alternatives. For very sensitive skin or a condition, consult a dermatologist for a suitable strength or gentler option.

    ⚠️ Caution: Retinol increases sun sensitivity and should be avoided during pregnancy and breastfeeding—use it at night with daily sunscreen and ease in slowly to prevent irritation.

    Key Takeaways

    • Retinol boosts cell turnover and collagen for smoother, firmer skin.
    • Expect an adjustment period; real results take one to six months.
    • Start 2–3 nights weekly, moisturize, and use daily sunscreen.
    • Begin with a low strength in airtight packaging.
    • Avoid during pregnancy and consult a dermatologist for sensitive skin.

    This article is general information and does not replace professional diagnosis or treatment. Consult a qualified provider if symptoms persist.
  • Essential Summer Makeup Items: Sunscreen and Base Must-Haves

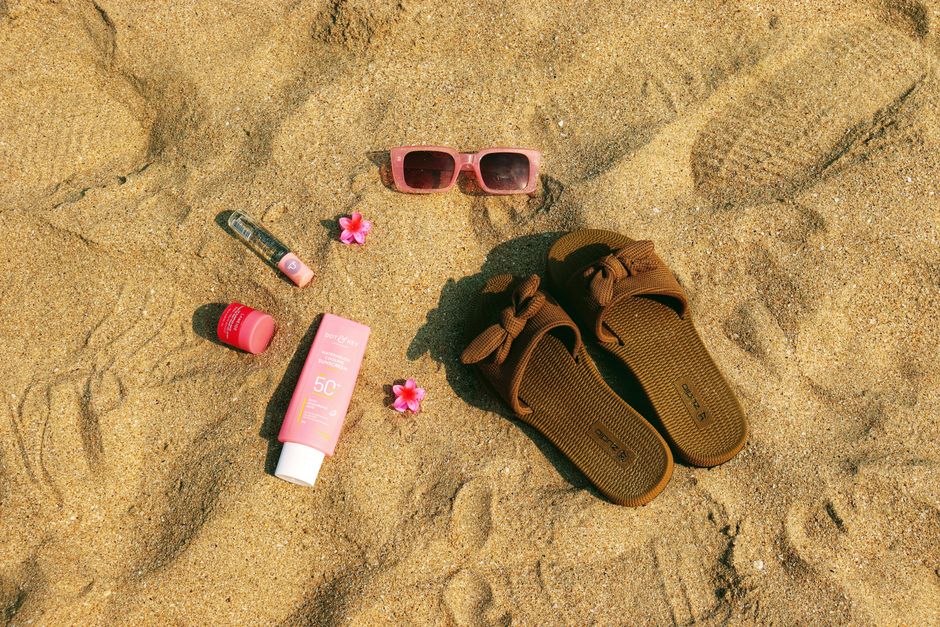
    Essential Summer Makeup Items: Sunscreen and Base Must-Haves

    👉 At a glance: Essential summer makeup items pair sun protection with a lightweight base for a fresh, lasting look. Prioritize a high-SPF sunscreen, a breathable base, setting products, and touch-up tools that stand up to heat and humidity.

    Summer Makeup Essentials Overview

    Summer makeup is all about staying protected and looking fresh despite heat, sweat, and strong sun. The foundation is the harmony between a reliable sunscreen and a light, breathable base.

    Rather than heavy coverage, the goal is a natural, long-wearing finish that will not melt or feel greasy. Choosing the right core items—and applying them in the right order—makes all the difference.

    A streamlined kit of well-chosen products beats a crowded bag of heavy formulas that struggle in humidity.

    Sun Protection Comes First

    A broad-spectrum sunscreen is the single most important summer item. Aim for at least SPF 30 (SPF 50 for long outdoor days) with strong UVA protection, in a lightweight, non-greasy formula.

    Gel and fluid sunscreens absorb quickly in heat, while mineral formulas suit sensitive skin. Keep a mist or stick sunscreen handy for reapplying, since protection needs refreshing every couple of hours outdoors.

    Waterproof or long-wear eye products round out a summer kit. Smudge-proof mascara and eyeliner resist sweat and humidity, keeping eye makeup crisp when everything else is tempted to slide.

    Base and Complexion Products

    For summer, reach for a lightweight base—tinted moisturizer, BB cream, or thin foundation—that gives coverage without heaviness. Oil-free and sweat-resistant formulas hold up best in humidity.

    A primer can extend wear and control shine, while a semi-matte finish prevents midday grease. Concealer for targeted spots lets you keep overall coverage light while still looking polished.

    A cream or liquid blush and a tinted lip balm are great summer choices, giving a fresh, natural flush of color that layers easily without the heaviness of powder products in the heat.

    Setting and Touch-Up Items

    Setting products lock your look in place. A light setting powder and a setting spray help makeup survive heat and sweat without caking. Applying thin layers and setting them keeps everything fresh.

    For touch-ups, blotting papers absorb oil without smudging, and a compact powder refreshes coverage quickly. These small items make a big difference through a hot day.

    Storing makeup properly matters more in summer, since heat can degrade formulas and encourage bacteria. Keep products out of hot cars, and replace anything that changes in smell or texture.

    Prepping your skin well makes summer makeup last longer. A hydrating but oil-free moisturizer creates a smooth canvas, while overly rich creams under makeup can cause products to slide in the heat.

    Possible Side Effects and Precautions

    Layering multiple products can cause pilling, clogged pores, or irritation, particularly with rich formulas. Choose non-comedogenic products and allow each layer to set to reduce these issues.

    Patch-test new sunscreens and bases before wearing all day, and simplify if you notice breakouts or irritation. Above all, SPF in makeup is not a substitute for a proper sunscreen.

    ⚠️ Caution: Do not rely on makeup’s built-in SPF for sun protection—use a dedicated broad-spectrum sunscreen and reapply it throughout the day, especially outdoors.

    Key Takeaways

    • Summer kits balance sun protection with lightweight complexion products.
    • A broad-spectrum SPF 30–50 sunscreen is the top priority.
    • Use breathable, sweat-resistant bases and targeted concealer.
    • Set makeup with powder or spray and carry blotting papers for touch-ups.
    • Patch-test products and rely on real sunscreen, not SPF makeup alone.

    This article is general information and does not replace professional diagnosis or treatment. Consult a qualified provider if symptoms persist.

  • Which Supplements Boost Immunity? Evidence-Based Picks That Work

    Which Supplements Boost Immunity? Evidence-Based Picks That Work

    👉 At a glance: The supplements with the best evidence for immune support are vitamin D, vitamin C, and zinc, followed by probiotics. They work best for correcting deficiencies and are most effective alongside sleep, nutrition, and exercise.

    What Does It Mean to Boost Immunity?

    No supplement makes the immune system invincible. What they can do is correct nutrient shortfalls that impair immune function and provide support during high-risk periods.

    This distinction matters: the biggest gains come from fixing deficiencies, not megadosing an already well-nourished body. Understanding which nutrients genuinely help—and which are overhyped—lets you spend wisely.

    The strongest foundation is always lifestyle, with supplements filling specific, evidence-based gaps.

    The Best-Supported Supplements

    Vitamin D has strong support because deficiency is common and directly affects immune regulation. For many, especially in winter, a daily supplement is one of the most worthwhile choices, ideally guided by a blood test.

    Vitamin C supports immune cells and acts as an antioxidant; while it will not prevent colds, adequate intake supports immune health. Zinc has good evidence for shortening cold duration when taken early.

    These three—vitamin D, vitamin C, and zinc—form the core of an evidence-based immune-support routine for most people.

    Be cautious about products with dramatic “immune booster” claims and long ingredient lists. Many contain trace, underdosed amounts that sound impressive but offer little real benefit for the price.

    Probiotics and Other Options

    Probiotics support the gut microbiome, where much immune activity occurs, and may improve resilience, though effects are strain-specific. Fermented foods provide a natural, food-based source.

    Other nutrients like selenium, vitamin A, and B6 play supporting roles but are usually well covered by a balanced diet. Herbal options like elderberry and echinacea have mixed evidence, so treat them as optional extras.

    How to Use Them Effectively

    Target the nutrients you are most likely to lack rather than taking everything. Take fat-soluble vitamins like D with a fatty meal, use zinc early when symptoms appear, and keep vitamin C at moderate doses.

    Consistency and correct timing outperform sporadic megadoses. Pair supplements with quality sleep, a nutrient-rich diet, exercise, and stress management for the best overall effect.

    Choosing quality products makes a difference. Look for third-party testing or recognized certifications, which confirm the stated dose without contaminants—an easy way to avoid wasting money.

    Possible Side Effects and Precautions

    Excess intake causes problems: too much vitamin C upsets the stomach, prolonged high-dose zinc depletes copper, and fat-soluble vitamins A and D can accumulate to harmful levels. Recommended doses exist for a reason.

    Supplements can interact with medications. Those pregnant, breastfeeding, taking prescriptions, or managing a condition should consult a provider first. Persistent illness warrants medical attention, not more supplements.

    ⚠️ Caution: Fixing deficiencies helps immunity, but megadoses can harm—stick to recommended amounts and consult a provider before supplementing if pregnant, medicated, or managing a condition.

    Choosing quality, third-party-tested products ensures you actually get the stated dose without contaminants, an easy way to avoid wasting money.

    Key Takeaways

    • Supplements support immunity mainly by correcting deficiencies.
    • Vitamin D, vitamin C, and zinc have the strongest evidence.
    • Probiotics support the gut-immune link; herbal options are optional.
    • Target likely gaps, time doses correctly, and stay consistent.
    • Avoid megadoses and check with a provider about interactions.

    This article is general information and does not replace professional diagnosis or treatment. Consult a qualified provider if symptoms persist.
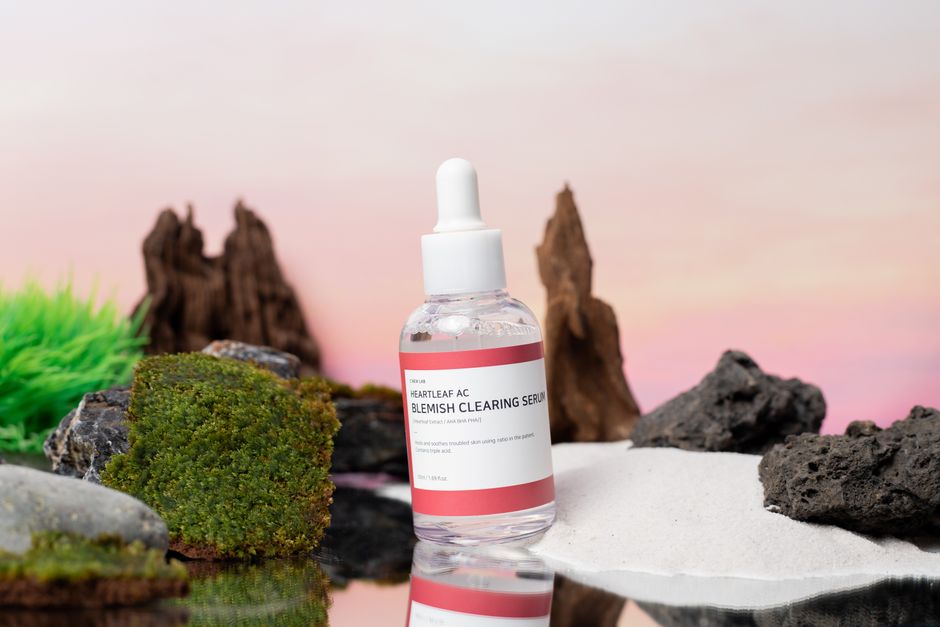
  • Acne Skincare Routine Order: A Step-by-Step Guide to Clear Skin

    Acne Skincare Routine Order: A Step-by-Step Guide to Clear Skin

    👉 At a glance: A well-ordered acne skincare routine—cleanse, treat, moisturize, and protect—keeps skin clear without over-stripping it. Choosing the right products for each step and applying them in order is the key to steady results.

    The Basics of an Acne Routine

    An effective acne routine does not require dozens of products—it requires the right ones in the right order, used consistently. The core steps are cleansing, treating, moisturizing, and, in the morning, sun protection.

    Acne forms when pores clog with oil and dead cells and bacteria trigger inflammation. A good routine keeps pores clear and calms inflammation while protecting the skin barrier, which is essential for healing and preventing new breakouts.

    Over-treating with harsh products is a common error that damages the barrier and worsens acne, so gentleness and consistency matter more than intensity.

    Step 1: Cleanse Correctly

    Cleanse twice daily with a gentle, non-stripping cleanser to remove oil, dirt, and buildup. Harsh, squeaky-clean cleansers can trigger more oil and irritation, so a mild formula is best even for oily skin.

    Avoid scrubbing aggressively. A salicylic acid cleanser can help clear pores, but pair it with hydration to prevent over-drying. Cleansing sets the stage for the treatment step to work effectively.

    Timing your actives helps avoid conflicts. For example, using benzoyl peroxide in the morning and a retinoid at night keeps them from deactivating each other and reduces the chance of doubling up on irritation.

    Step 2: Treat and Target

    After cleansing, apply targeted treatments. Salicylic acid clears clogged pores, benzoyl peroxide reduces acne bacteria on active breakouts, and retinoids like adapalene prevent new clogs and improve texture over time.

    Introduce one active at a time and start slowly—every other night—to let skin adjust. Niacinamide can be layered in to soothe redness and control oil. Treat the whole acne-prone area, not just spots, to prevent future breakouts.

    Look for moisturizers with barrier-supporting ingredients like ceramides, glycerin, or hyaluronic acid. These hydrate without heaviness and strengthen the skin’s defenses, especially valuable while using drying acne treatments.

    Step 3 and 4: Moisturize and Protect

    Even oily, acne-prone skin needs a lightweight, non-comedogenic moisturizer. Hydration supports the barrier, reduces irritation, and helps balance oil production.

    In the morning, finish with a broad-spectrum, oil-free sunscreen of SPF 30 or higher. Many acne actives increase sun sensitivity, and UV exposure darkens post-acne marks, prolonging their appearance.

    Keeping the rest of your routine simple while your skin adjusts is wise. Adding several new products at once makes it impossible to tell what is helping or causing irritation, so change one thing at a time.

    Tracking your skin with occasional photos helps you judge whether your routine is working. Because acne improves gradually, this record keeps you from switching products too soon or abandoning an approach before it has had a fair chance.

    Possible Side Effects and Precautions

    Acne actives commonly cause dryness, peeling, redness, or a temporary purge as skin adjusts. Easing in gradually, moisturizing, and not stacking strong products keeps these manageable. Most treatments take six to eight weeks to show results.

    For severe, cystic, or scarring acne, consult a dermatologist rather than relying on over-the-counter products. Pregnant or breastfeeding individuals should avoid certain ingredients, including many retinoids, and check safe alternatives with a professional.

    ⚠️ Caution: Caution: Avoid over-cleansing and combining too many strong actives, which worsen acne; use sunscreen daily and see a dermatologist for cystic or scarring breakouts.

    Key Takeaways

    • Follow a simple order: cleanse, treat, moisturize, protect.
    • Cleanse gently twice daily without stripping the skin.
    • Use salicylic acid, benzoyl peroxide, or retinoids—one at a time.
    • Always moisturize and finish mornings with sunscreen.
    • Give it 6–8 weeks and see a dermatologist for severe acne.

    This article is general information and does not replace professional diagnosis or treatment. Consult a qualified provider if symptoms persist.