Author: KC

  • Retinol: Wrinkle Improvement and Safe Usage Guide

    Retinol: Wrinkle Improvement and Safe Usage Guide

    제품 이미지

    👉 At a glance: Retinol is renowned for its anti-aging benefits, specifically in reducing wrinkles and refining skin texture. However, it requires cautious use to avoid adverse effects like irritation, making it crucial to match the product with your skin type.

    Understanding Retinol’s Wrinkle-Reducing Effects

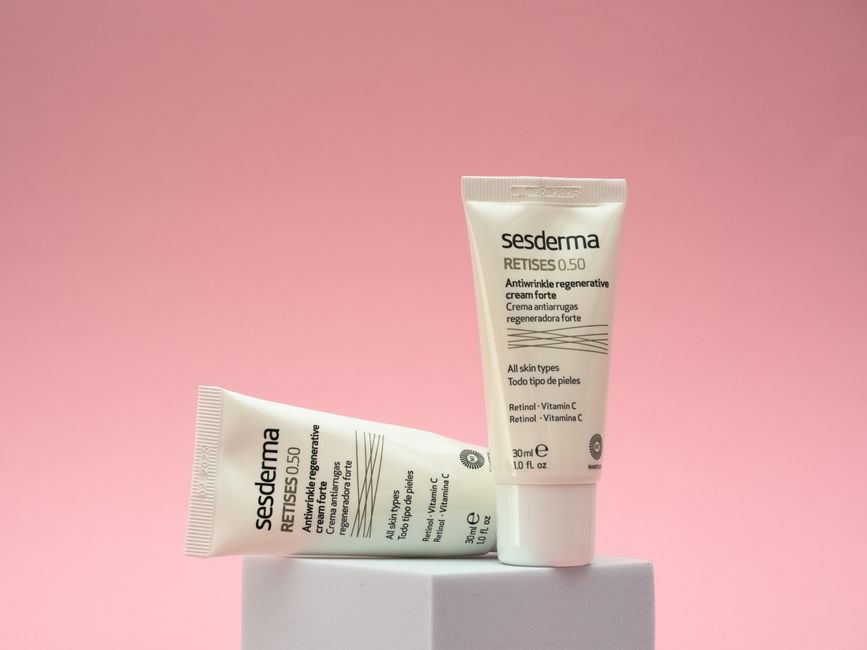
    Retinol, a derivative of Vitamin A, is a potent ingredient in the fight against aging. It works by boosting collagen production, which helps to smooth fine lines and improve skin elasticity. Consistent use can lead to a visible reduction in wrinkles and a more youthful appearance.

    The effectiveness of retinol in managing wrinkles has been supported by various studies, which highlight its role in promoting faster skin cell turnover and collagen synthesis. This results in firmer, more resilient skin.

    Potential Side Effects of Retinol

    Despite its benefits, retinol can cause irritation when first introduced to the skin care regimen. Common side effects include redness, dryness, and peeling, particularly if used in high concentrations or applied too frequently.

    To minimize these effects, it’s advisable to start with a low concentration and gradually increase usage as the skin builds tolerance. Avoid using retinol in combination with other potent exfoliants, like AHA or BHA, to prevent exacerbating skin sensitivity.

    Is Retinol Suitable for Your Skin Type?

    Retinol can be beneficial for most skin types, but it is particularly effective for mature or acne-prone skin. However, those with sensitive skin might experience increased irritation and should approach retinol with caution.

    Before incorporating retinol into your routine, it’s wise to perform a patch test. For those with sensitive skin, using a lower concentration formula or applying a buffer, such as a moisturizer, before retinol can help mitigate potential irritation.

    Safe Retinol Application

    For optimal results, retinol should be applied in the evening after cleansing. It is sensitive to sunlight, which can reduce its efficacy and increase the risk of sun sensitivity. Ensure your skin is dry before application to prevent irritation.

    Begin with a pea-sized amount for the entire face, avoiding the sensitive eye area. Gradually increase usage from once or twice a week to every other night, as tolerated.

    Combining Retinol with Other Products

    When using retinol, it’s crucial to coordinate with other skincare products to avoid over-exfoliation. Avoid using retinol on the same day as other active ingredients like AHA or BHA.

    Instead, alternate these powerful ingredients on different days or integrate them into your morning routine, ensuring to apply a broad-spectrum sunscreen daily.

    ⚠️ Caution: Retinol is not recommended for those who are pregnant or breastfeeding. Consult a healthcare provider before use.

    Key Takeaways

    • Retinol enhances skin texture and reduces wrinkles by promoting collagen production.
    • Start with a low concentration to minimize initial skin irritation.
    • Retinol is suitable for most skin types, but sensitivity testing is advised for sensitive skin.
    • Apply retinol in the evening and always use sunscreen during the day.
    • Avoid using retinol with other strong exfoliants on the same day.

    This article is general information. Patch-test new skincare and consult a dermatologist for persistent skin concerns.


  • Master Cooking with a Simple Egg Fried Rice Recipe for Students

    Master Cooking with a Simple Egg Fried Rice Recipe for Students

    제품 이미지

    👉 At a glance: Looking for a quick and simple meal? This easy egg fried rice recipe is perfect for students, requiring minimal ingredients and effort, while also allowing for creative variations.

    Secret to Simple Egg Fried Rice

    The key to making simple egg fried rice is using day-old rice. It helps achieve the desired texture without becoming mushy. Start by heating a pan with oil and sautéing chopped onions and garlic until fragrant. Add the rice and stir well to break any clumps.

    Once the rice is heated through, push it to the side of the pan and add beaten eggs. Scramble until cooked, then mix with the rice. Season with soy sauce, salt, and pepper to taste. Finish with a drizzle of sesame oil for added flavor.

    Versatile Ingredients for Creative Variations

    Egg fried rice is highly adaptable, allowing you to experiment with various ingredients. For a nutritious boost, toss in vegetables like peas, carrots, or bell peppers. For protein, add cooked chicken, shrimp, or tofu.

    Feel free to play with flavors by incorporating different spices or sauces. A dash of chili sauce can add heat, while oyster sauce brings depth. Let your taste preferences guide your culinary adventure!

    Cooking Tips for Students

    For students new to cooking, keep it simple by preparing all ingredients before you start cooking. This streamlines the process and reduces stress. Use a non-stick pan to prevent sticking and ensure easy cleanup.

    When cooking, maintain medium heat to avoid burning. Stir frequently to ensure even cooking and prevent ingredients from sticking to the pan. Cooking in batches can help manage portions and prevent overcrowding the pan.

    Budget-Friendly Meal Options

    Egg fried rice is not only easy but also economical. Rice and eggs are cost-effective staples that can be found in almost every household. By using leftover ingredients, you can create a satisfying meal without breaking the bank.

    To save even more, purchase ingredients in bulk when on sale. Stock up on pantry essentials like soy sauce and cooking oil to reduce future grocery costs.

    Enhancing Flavor with Simple Additions

    For an extra layer of flavor, consider adding a hint of sweetness with a sprinkle of sugar. To enhance the umami profile, a small amount of fish sauce can do wonders. Fresh herbs like cilantro or scallions can provide a fresh finish.

    Experimenting with different oils, such as coconut or peanut, can also introduce new flavors and aromas, taking your egg fried rice to the next level.

    Avoiding Common Mistakes

    One common mistake when making egg fried rice is using freshly cooked rice. Fresh rice tends to be too moist and can lead to a sticky texture. Instead, use rice that has been refrigerated overnight for the best results.

    Another tip is to avoid overcrowding the pan, which can result in uneven cooking. If necessary, cook in batches to ensure each ingredient is cooked properly.

    ⚠️ Caution: Ensure all ingredients are cooked to the appropriate temperature to avoid foodborne illnesses.

    Key Takeaways

    • Day-old rice is best for fried rice to achieve a proper texture.
    • Egg fried rice can be customized with various proteins and vegetables.
    • Prepare ingredients in advance to streamline the cooking process.
    • Experiment with different oils and sauces for unique flavors.
    • Use leftover ingredients for a budget-friendly meal.

    This article is general information about a traditional dish and is not medical advice.

  • Essential Guide for First-Time Cat Owners: Preparing for Adoption

    Essential Guide for First-Time Cat Owners: Preparing for Adoption

    제품 이미지

    👉 At a glance: Preparing to adopt a cat requires essential supplies, mindful budgeting, and understanding basic care tips to ensure a smooth transition.

    Essential Supplies for Cat Adoption

    Before bringing your new feline friend home, it’s important to gather a few essential supplies. A sturdy carrier is a must for safe transport. Invest in quality food and water bowls, preferably made of stainless steel or ceramic to ensure hygiene. Don’t forget a litter box and clumping litter to keep your cat’s space clean.

    Additionally, scratching posts and toys are vital for your cat’s mental and physical health. These items cater to their natural instincts and help prevent damage to your furniture.

    Budget-Friendly Tips

    Adopting a cat doesn’t have to break the bank. Look for sales or discounts on pet supplies online or at local stores. Consider purchasing gently used items like carriers or toys from reliable sources. For ongoing savings, buy cat food in bulk and seek out subscription services for regular discounts.

    Remember, while saving money is important, never compromise on the quality of food and litter as these directly affect your cat’s health and comfort.

    Beginner Cat Care Tips

    Understanding basic cat care is crucial for first-time cat owners. Cats are creatures of habit, so establishing a routine for feeding, cleaning, and playtime can help them feel secure. Pay attention to their body language and vocalizations to better understand their needs.

    Regular vet visits are essential for vaccinations and health checks. Also, consider spaying or neutering your cat to avoid unwanted litters and reduce health risks.

    Creating a Safe Home Environment

    A safe environment is crucial for your cat’s well-being. Ensure that windows and balconies are secure to prevent accidental falls. Store household chemicals and small objects out of reach, as these can be harmful if ingested.

    Invest in a few comfortable spots for your cat to rest, as they love to have their own space to retreat to when they need peace and quiet.

    Socializing Your New Cat

    Socialization is key to ensuring your cat is comfortable in their new home. Allow them time to explore their surroundings at their own pace. Gradually introduce new people and pets to avoid overwhelming them. Use treats and positive reinforcement to encourage positive interactions.

    Remember, patience is vital during this adjustment period. Each cat is unique, and some may take longer to adapt than others.

    Understanding Cat Behavior

    Cats communicate through a series of gestures and sounds. Learning to interpret these signals will help you provide better care. If your cat shows signs of distress or illness, consult a veterinarian immediately. Recognizing and responding to behavioral changes is vital for ensuring their well-being.

    Consider reading books or online resources about feline behavior to enhance your understanding and strengthen your bond with your cat.

    ⚠️ Caution: Always supervise interactions between your new cat and other pets or children to prevent accidents.

    Key Takeaways

    • Gather essential supplies like a carrier, litter box, and quality food bowls before adopting.
    • Save on costs by looking for discounts and buying essential items in bulk.
    • Establish routines for feeding and play to help your cat adjust.
    • Create a safe and secure home environment to prevent accidents.
    • Take time to understand your cat’s behavior for better care and bonding.

    This article is general information and does not replace professional diagnosis or treatment. Consult a qualified provider if symptoms persist.

  • Achieve Perfect Hydration with Soothing Gel and Moisturizing Cream

    Achieve Perfect Hydration with Soothing Gel and Moisturizing Cream

    제품 이미지

    👉 At a glance: Learn how to choose between soothing gels and moisturizing creams based on your skin type and enhance their effects for ultimate hydration.

    Difference Between Soothing Gel and Moisturizing Cream

    The primary distinction between soothing gel and moisturizing cream lies in their texture and purpose. Soothing gels are lightweight and provide immediate cooling and hydration, making them ideal for sensitive or irritated skin. In contrast, moisturizing creams have a thicker consistency designed to create a protective barrier, locking in moisture for long-lasting hydration.

    Choosing the right product depends on your specific skin needs and environmental factors like the season. During hotter months, soothing gels can offer relief from the heat, while in colder months, the protective nature of creams can combat dryness.

    Choosing Products Based on Skin Type

    When selecting between soothing gels and creams, consider your skin type. Oily or acne-prone skin may benefit from the light, non-greasy texture of a gel. In contrast, dry or mature skin types might find that creams provide the necessary nourishment and protection.

    For combination skin, using both products in a layered approach can balance oil production and hydration, catering to different skin areas effectively.

    Maximizing Hydration with Layering Techniques

    To enhance hydration, consider layering your skincare. Start with a soothing gel to infuse the skin with moisture. Once absorbed, follow with a moisturizing cream to seal in the hydration.

    This method prevents moisture loss and provides a dual-action approach to tackling dryness, particularly effective during transitional weather periods where skin tends to be more reactive.

    Seasonal Adjustments for Optimal Skin Care

    Adjusting your skincare routine to match the season is crucial for maintaining balanced skin. In summer, opt for cooling soothing gels that refresh and calm sun-exposed skin. As temperatures drop, switch to richer creams to combat the harsh, drying effects of winter.

    These adjustments ensure your skin receives what it needs to stay healthy and hydrated throughout the year.

    Effective Application Techniques

    Proper application is key to maximizing the benefits of soothing gels and creams. Apply gels to slightly damp skin to boost absorption, and use a gentle patting motion rather than rubbing to avoid irritation.

    When applying creams, a small amount goes a long way. Focus on areas prone to dryness, such as cheeks and forehead, ensuring an even distribution for optimal hydration.

    Tips for Sensitive Skin

    Sensitive skin requires gentle care. Look for fragrance-free and hypoallergenic products to avoid irritation. Patch-test new products on a small area before full application to ensure compatibility.

    Additionally, incorporating ingredients like aloe vera or chamomile can provide soothing effects, making your skincare routine both effective and calming.

    ⚠️ Caution: Always check ingredient lists for potential allergens and consult a dermatologist if you experience persistent irritation or adverse reactions.

    Key Takeaways

    • Choose products based on your skin type and environmental conditions.
    • Layer soothing gel and cream for maximized hydration.
    • Adjust your routine seasonally to maintain balanced skin.
    • For sensitive skin, use gentle, hypoallergenic products.
    • Patch-test all new products to ensure compatibility with your skin.

    This article is general information. Patch-test new skincare and consult a dermatologist for persistent skin concerns.

  • Secrets to Perfect Salt-Grilled Live Shrimp and Air-Fried Shrimp Heads

    Secrets to Perfect Salt-Grilled Live Shrimp and Air-Fried Shrimp Heads

    제품 이미지

    👉 At a glance: Learn how to cook live shrimp perfectly with salt grilling techniques and explore tips for air-frying shrimp heads for a crunchy delight, all while understanding the nutritional benefits that shrimp bring to your diet.

    How to Cook Live Shrimp Perfectly

    Cooking live shrimp can be an exquisite experience if done right. The key to achieving the best flavor and texture is to use the salt-grilling method. By placing shrimp on a bed of coarse salt and cooking it slowly, the moisture is locked in, resulting in juicy and tender shrimp.

    Start by cleaning the shrimp under cold water, removing any impurities. Arrange the shrimp on a thick layer of coarse salt, ensuring they do not touch each other. Cover with a lid and cook on medium heat until the color turns a vibrant pink. This method enhances the natural sweetness of the shrimp without overwhelming it with additional flavors.

    Air Fryer Tips for Crispy Shrimp Heads

    For a delicious second course, try air-frying shrimp heads to create a crispy treat. After removing the heads from the grilled shrimp, coat them lightly with rice flour and olive oil. This coating helps achieve a crunchy texture.

    Place the coated shrimp heads in the air fryer basket lined with parchment paper. Cook at 180°C (356°F) for about 10-15 minutes. Remember to shake the basket midway to ensure even cooking. The result is a delightfully crispy snack that pairs well with a spicy dipping sauce.

    The Nutritional Benefits of Shrimp

    Shrimp are not just delicious; they are also packed with nutrients. They are low in calories yet high in protein, making them a great choice for those looking to maintain a healthy diet. Shrimp are also rich in omega-3 fatty acids, which are beneficial for heart health and inflammation reduction.

    Moreover, shrimp contain essential vitamins and minerals such as vitamin B12, iodine, and selenium, which support energy production and thyroid function. Including shrimp in your diet can help boost your immune system and overall well-being.

    Enhancing Flavor with Simple Ingredients

    While shrimp are flavorful on their own, experimenting with simple ingredients can elevate their taste. Try adding a splash of lemon juice or a sprinkle of fresh herbs like parsley or cilantro once the shrimp are cooked. These ingredients can enhance the natural flavors without overpowering them.

    Additionally, serving shrimp with a side of vibrant dipping sauces, such as spicy aioli or tangy cocktail sauce, can complement their taste and provide a refreshing contrast.

    Pairing Suggestions for a Complete Meal

    To create a balanced meal, consider pairing shrimp dishes with complementary sides. A crisp green salad with a light vinaigrette or a serving of steamed vegetables can provide a refreshing contrast to the rich flavors of the shrimp. For a heartier option, serve with a side of garlic butter pasta or fluffy jasmine rice.

    These pairings not only enhance the dining experience but also contribute to a nutritious and satisfying meal that is sure to impress.

    ⚠️ Caution: Ensure shrimp are fresh and sourced from reputable suppliers to avoid any food safety issues.

    Key Takeaways

    • Salt-grilling preserves moisture and enhances the natural sweetness of shrimp.
    • Air-frying shrimp heads with a light flour coating offers a crispy treat.
    • Shrimp provide high-quality protein and essential nutrients.
    • Simple ingredients like lemon and herbs can elevate shrimp dishes.
    • Pair shrimp with fresh salads or pasta for a complete meal.

    This article is general information about a traditional dish and is not medical advice.

  • Tongyeong Day Trip: Must-Visit Spots and Food Recommendations

    Tongyeong Day Trip: Must-Visit Spots and Food Recommendations

    제품 이미지

    👉 At a glance: Discover Tongyeong’s vibrant culture and cuisine in a single day with our detailed itinerary.

    Must-Visit Attractions in Tongyeong

    When in Tongyeong, start your day trip at the iconic Dongpirang Mural Village. This quaint hillside village is renowned for its colorful murals and offers a panoramic view of the port city. Next, head to the Tongyeong Central Market, a bustling hub of local life where you can experience the vibrant energy of the city.

    Don’t miss the Samdo Sugun Tongjeyeong, a historical site where you can explore the legacy of Korea’s naval history. The impressive architecture and serene atmosphere make it a perfect stop for history enthusiasts.

    Local Delicacies to Savor

    No trip to Tongyeong is complete without indulging in its culinary delights. Start with the famous Chungmu Gimbap, small rolls of rice wrapped in seaweed, traditionally served with spicy radish and squid. Another must-try is the Tongyeong Honey Bread, a sweet treat that captures the essence of this delightful city.

    For seafood lovers, a visit to the market will allow you to sample fresh catches such as abalone and sea cucumber, offering a taste of the ocean’s bounty.

    Crafting the Perfect Day Trip Itinerary

    A well-planned itinerary will allow you to enjoy Tongyeong’s offerings without feeling rushed. Begin your day at the Dongpirang Mural Village and then walk to the Tongyeong Central Market for a late breakfast or early lunch.

    Afterward, visit the Samdo Sugun Tongjeyeong to delve into the historical aspects of the city. End your day with a relaxing stroll by the Gangguan Port, where you can unwind and take in the sunset views.

    Seasonal Activities to Enhance Your Visit

    Tongyeong offers various activities suitable for different seasons. In spring, the Cherry Blossom Festivals provide a perfect backdrop for a memorable visit. Summertime is ideal for exploring the nearby islands and enjoying water activities.

    In autumn, the mild weather makes it a great time for hiking and exploring the trails around the city. Winter visitors can enjoy the Tongyeong Winter Festival, where the city lights up with festive decorations.

    ⚠️ Caution: Check the local weather and event schedules to ensure a smooth and enjoyable day trip.

    Key Takeaways

    • Plan your itinerary to cover must-see attractions like Dongpirang Mural Village.
    • Sample local delicacies such as Chungmu Gimbap and Tongyeong Honey Bread.
    • Time your visit with seasonal activities for a richer experience.
    • Ensure to check the opening hours of attractions to make the most of your day.
    • Relax by the Gangguan Port to end your trip with stunning views.

    This article is general information about travel and is not medical advice.

  • How to Choose Low Molecular Weight Collagen: Absorption Rates and Benefits Compared

    How to Choose Low Molecular Weight Collagen: Absorption Rates and Benefits Compared

    제품 이미지

    👉 At a glance: Learn how low molecular weight collagen can enhance skin health, how to select a product with superior absorption, and the potential side effects to be aware of.

    The Benefits of Low Molecular Weight Collagen

    Low molecular weight collagen is renowned for its ability to improve skin elasticity and hydration. This type of collagen, often processed into smaller peptides, is easier for the body to absorb, leading to more effective results.

    In addition to skin benefits, it’s also believed to support joint health by maintaining cartilage strength and flexibility.

    How to Choose Collagen with High Absorption

    When selecting a collagen supplement, look for those labeled as low molecular weight or peptide-based. These are more likely to be absorbed efficiently by your body.

    Check the product’s source; fish collagen is often preferred for its smaller particle size. Additionally, opt for products that disclose molecular size and daily dosage for more informed choices.

    Understanding Collagen’s Role in Skin Structure

    Collagen plays a crucial role in maintaining the skin’s structure alongside other components like elastin and hyaluronic acid. It helps keep skin firm and hydrated.

    For the best results, consider supplements that combine collagen with these other beneficial ingredients.

    Potential Side Effects and Precautions

    Be cautious of potential allergies, especially if you have a fish or seafood allergy, as many collagen supplements derive from marine sources.

    Consult with a healthcare provider before starting any new supplement regimen, particularly if you have underlying health conditions.

    User Reviews and Scientific Evidence

    Many users report improvements in skin texture and joint comfort after consistent use over several months. However, results can vary based on individual factors.

    Scientific studies back the efficacy of collagen for skin and joint health, but more research is needed to fully understand its potential.

    Factors Affecting Collagen Absorption

    Collagen absorption can be influenced by factors such as vitamin C intake and overall hydration. It’s beneficial to ensure a balanced diet to maximize benefits.

    Avoid excessive sun exposure and smoking, which can degrade collagen and impede its benefits.

    ⚠️ Caution: Always verify the source of collagen and consult with a healthcare provider if you have health concerns or allergies.

    Key Takeaways

    • Low molecular weight collagen is absorbed more efficiently by the body.
    • Choose collagen supplements that clearly list molecular size and dosage.
    • Supplementing with vitamin C can enhance collagen absorption.
    • Consider potential allergens in marine-derived collagen products.
    • Consistent use can lead to visible improvements in skin and joint health.

    This article is general information and does not replace professional medical advice. Consult a provider before starting supplements.

  • Effective Tips to Remove Musty Laundry Smells: How to Use Odor Elimination Boosters

    Effective Tips to Remove Musty Laundry Smells: How to Use Odor Elimination Boosters

    제품 이미지

    👉 At a glance: Discover the underlying causes of musty laundry odors and explore effective methods to eliminate them with odor removal boosters, comparing their benefits to other approaches.

    What Causes Musty Smells in Laundry?

    Musty smells in laundry can be a persistent issue, often arising from moisture and insufficient drying. When clothes are left damp for too long, they become a breeding ground for mold and mildew, which are primary sources of these odors. Additionally, detergent buildup in washers can exacerbate the problem by providing a medium for bacteria and mold to thrive.

    Regular maintenance of your washing machine and ensuring clothes are fully dried are key to preventing these unwanted smells.

    How to Use Odor Elimination Boosters Effectively

    Odor elimination boosters are designed to tackle persistent smells directly. To use them effectively, add the booster to your washing cycle along with your regular detergent. For loads under 7kg, one booster is sufficient, while heavier loads may require two. These boosters work by neutralizing odors at their source, offering a fresh and clean scent.

    They are especially useful for gym clothes, towels, and other items prone to developing strong odors.

    Advantages of Odor Elimination Boosters Over Other Methods

    While other methods like vinegar or baking soda are popular for odor removal, odor elimination boosters provide a more targeted and potent solution. Unlike vinegar, which may require prolonged soaking, or baking soda, which can be less effective against strong odors, boosters are easy to use during a regular wash cycle and are specifically formulated to combat tough smells.

    Moreover, they often leave behind a pleasant scent, enhancing the freshness of your laundry.

    Comparing Odor Elimination Products

    There are various odor elimination products on the market, each with its own strengths. Some focus on providing a long-lasting fragrance, while others prioritize neutralizing odors without additional scents. It’s important to choose a product that aligns with your personal preferences and laundry needs.

    Testing different products can help you find the one that works best for your household.

    User Tips for Maximizing Booster Effectiveness

    For optimal results, it’s crucial to follow the manufacturer’s instructions regarding the amount of booster to use per load. Overuse can lead to residue buildup, while underuse might not sufficiently remove odors. Additionally, pairing boosters with a regular cleaning routine for your washing machine can ensure prolonged effectiveness.

    Monitoring and adapting your approach based on the type of laundry and odor severity can also enhance outcomes.

    ⚠️ Caution: Odor elimination boosters should be used as directed to avoid potential irritation or material damage. Always test new products on a small laundry sample first.

    Key Takeaways

    • Musty laundry smells are often caused by moisture and mildew.
    • Odor elimination boosters provide a targeted approach for removing stubborn odors.
    • Compared to other methods, boosters are more convenient and effective.
    • Following usage instructions is key to maximizing their benefits.

    This article is general information and does not replace professional diagnosis or treatment. Consult a qualified provider if symptoms persist.

  • Effortless Summer Side Dish Recipes for Freshness

    Effortless Summer Side Dish Recipes for Freshness

    제품 이미지

    👉 At a glance: Keep your summer side dishes fresh with proper storage methods and explore delicious, easy-to-make recipes that are perfect for balancing nutrition.

    How to Store Summer Side Dishes Freshly

    To maintain the freshness of summer side dishes, it’s crucial to store them correctly. Use airtight containers to prevent air exposure, which can lead to spoilage. Storing dishes in the refrigerator at a consistent temperature below 40°F helps preserve their quality.

    Additionally, incorporating moisture-absorbing materials like paper towels can extend shelf life by reducing excess humidity.

    Easy Summer Side Dish Recipes

    Enjoy the ease of preparing summer side dishes like cucumber salad. Simply slice cucumbers, onions, and toss them with vinegar, salt, and pepper for a refreshing taste. For added zest, include ingredients like dill and garlic.

    Consider a zucchini stir-fry by sautéing sliced zucchini with olive oil, garlic, and a sprinkle of parmesan cheese. This dish is both quick and flavorful.

    Balancing Nutrition in Summer Side Dishes

    Achieving nutritional balance in summer side dishes can be simple. Incorporate a variety of colorful vegetables to ensure a mix of vitamins and minerals. Adding sources of healthy fats like avocados or nuts can enhance the nutrient profile.

    For protein, consider plant-based options like chickpeas or beans, which also add texture and flavor to dishes.

    Refreshing Tomato and Basil Salad

    A simple yet delightful dish is a tomato and basil salad. Combine ripe tomatoes, fresh basil leaves, a drizzle of olive oil, and a dash of salt and pepper. This salad celebrates the flavors of summer and is both light and nutritious.

    Enhance the dish with mozzarella or feta cheese for a creamy texture.

    Chilled Green Bean and Almond Salad

    For a crunchy and refreshing side, prepare a green bean and almond salad. Blanch green beans, then cool rapidly in ice water to retain their vibrant color. Toss with toasted almonds, lemon juice, and a hint of garlic for an invigorating dish.

    This salad offers a satisfying combination of textures and nutrients.

    ⚠️ Caution: Ensure proper washing and handling of all fresh ingredients to avoid contamination.

    Key Takeaways

    • Store summer side dishes in airtight containers to maintain freshness.
    • Incorporate a variety of colorful vegetables to balance nutrition.
    • Simple recipes like cucumber salad are quick and delicious.
    • Use fresh herbs to enhance flavor and freshness.
    • Ensure proper hygiene to prevent contamination.

    This article is general information about a traditional dish and is not medical advice.

  • Effortless Skin Hydration with Stick Balms: Your Ultimate Guide

    Effortless Skin Hydration with Stick Balms: Your Ultimate Guide

    제품 이미지

    👉 At a glance: Stick balms offer a convenient and mess-free way to moisturize different skin types with long-lasting hydration.

    What Are the Key Ingredients in Stick Balms?

    Stick balms are formulated with a blend of nourishing oils and waxes designed to provide deep hydration. Common ingredients include shea butter, coconut oil, and beeswax, which help to lock in moisture and protect the skin barrier.

    Additionally, plant-based oils such as jojoba oil and sunflower seed oil are often included for their emollient properties and ability to enhance skin texture.

    How Long Does the Moisturizing Effect Last?

    The moisturizing effect of stick balms can last for several hours, depending on the formulation and your skin type. These balms create a protective layer on the skin, offering a feeling akin to a moisture shield.

    For those with extremely dry skin, reapplying every four to six hours might be necessary to maintain optimal hydration.

    Choosing the Right Stick Balm for Your Skin Type

    Selecting the appropriate stick balm involves considering your skin type and concerns. For oily skin, look for non-comedogenic options that won’t clog pores, such as those containing tea tree oil.

    For dry or sensitive skin, balms with soothing ingredients like aloe vera or chamomile can provide comfort and hydration.

    Comparing Popular Stick Balm Products

    There are various stick balms available on the market, each offering unique benefits. For instance, the Burt’s Bees All-Weather Balm is renowned for its long-lasting moisture and protective qualities.

    Another option, the Dr. Jart+ Cicapair Calming Balm, is favored for its calming effects on sensitive skin.

    User Reviews and Experiences

    Users of stick balms frequently report that these products are easy to apply and integrate seamlessly into their daily routines. Many appreciate the compact size, making them ideal for on-the-go use.

    Reviews also highlight how stick balms provide a natural glow without leaving a greasy residue.

    Maximizing the Benefits of Your Stick Balm

    To get the most out of your stick balm, apply it on lightly damp skin to enhance absorption. This method ensures that the hydration lasts longer and the skin retains moisture effectively.

    Using a gentle exfoliator regularly can also help remove dead skin cells, allowing the balm to penetrate deeper into the skin layers.

    ⚠️ Caution: Always check the ingredient list for potential allergens and conduct a patch test before applying any new product extensively.

    Key Takeaways

    • Stick balms are versatile and suitable for various skin types.
    • Check the ingredient list to ensure it meets your skin’s needs.
    • Moisturizing effects can last for several hours, enhancing skin hydration.
    • Portable and easy to use, they fit conveniently in any bag.
    • Ideal for quick touch-ups without leaving a sticky residue.

    This article is general information. Patch-test new skincare and consult a dermatologist for persistent skin concerns.